Why you should work with test driven development in your projects (ft. react example)
Improve your project quality with this amazing development technique!


Testing is such an interesting topic that I see so many people put aside and ignore. As a software engineer student I've seen many developers write new code for different projects without giving a proper time to testing, some will usually just check out a few test cases and leave it like that. I want to explore deep down the lifestyle that is TDD.
What the h*ck is test driven development?
In simple terms, TDD is a software development technique to test your code before you actually start developing something. It kind of sounds crazy but just hear me out!
TDD starts with designing and developing test for every meaningful functionality in your program, it instructs the developer to just write code if the automated test fails. This way the developer will always know if there's a bug inside the project.
Why automated testing?

Some people may think, well I'm sure of the quality of the code I write, so I don't need to test it every single time, and if something breaks I'll notice. But, can you be sure of the quality of the code? Will you always notice when something breaks? Better to have proof than to be certain.
Automated testing helps you to always test every case you are accounting for without having to manually test everything, and it even has some other extra benefits!
Time
Let's say you are on a project that is constantly subjected to changes, there's a lot bugs and you aren't sure if the new functionalities you are implementing is breaking something else. Without automated testing you would always have to validate manually every single test case there is to be sure that nothing is breaking.
Writing automated testing can save you a lot of time by avoiding this repetitive cycle of implementing a new functionality and having to test everything manually after that new implementation.
Higher test coverage
Conventional development models that include manual testing put a limit on how many tests you can verify. By spending less time on manual testing by having automated tests, it increases the test coverage of your software project, so more features are properly tested and by that improving your product's quality.
Confidence and relief
That moment when you see all of your tests pass it feels amazing! Not just because everything works as its supposed to, but also because you can be certain that nothing will break your code, and you won't have that awful feeling of, could something go wrong?
There are so more benefits for automated testing, but these are just a few of them.
TDD life cycle
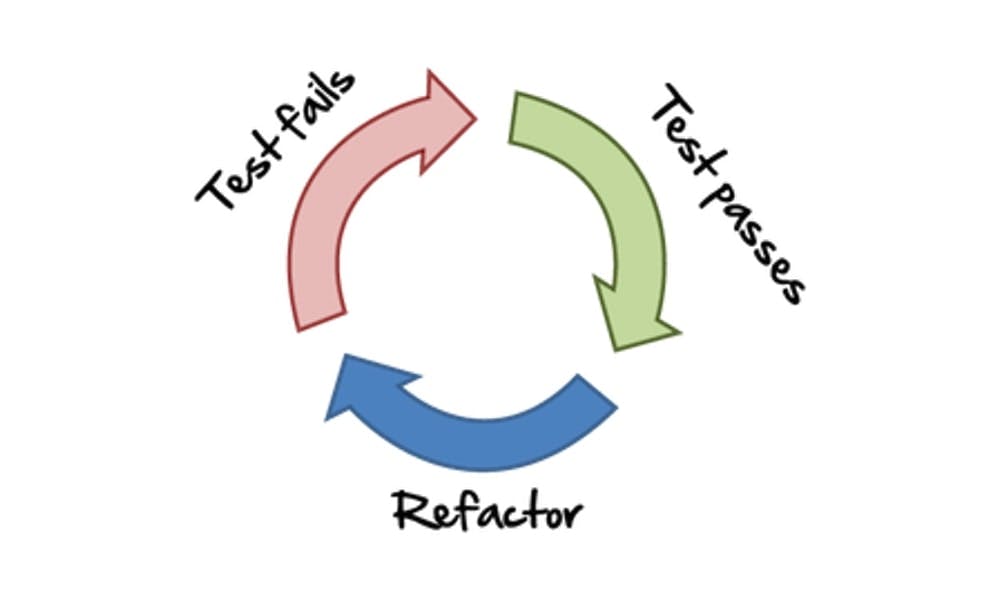
TDD consists in three main phases let's call them the red one, the green one, and the refactoring one
Creating a succesful test (the red one)
The main goal of this phase is to create a test for a functionality of a feature that is yet to develop, this test will most likely fail because the code hasn't been written yet. Let's remember that this is a test based on a developer's assumption on how a feature most behave.
Correcting the errors (the green one)
Once the red phase is completed is time to make that test glow green! During these phase the developer will write the minimal code necessary to make the test pass.
Refactoring code (the refactoring one)
Making a test pass is not the end! It's great that a test has passed, but now what's left is to make your code look clean and snazzy. It's always important to refactor your code, you don't have to follow TDD to do this step. Refactoring your code makes it easier to read and maintain, it should always be done.
Let's get to work and put it in practice
This will be a simple example on how to correctly apply TDD, the goal of it is just to make clear how can you apply this technique in your actual projects.
Tech stack
This example will be shown by using react.js library with create-react-app given that it comes by default with the react-testing-library and jest, both amazing test libraries.
Practice
For this example we'll just make a simple form that will contain the following:
- Title
- Name and age input
- Submit button
I'll leave the codesanbox code for anyone to watch the tests closely.
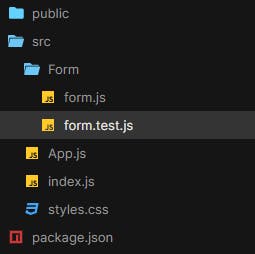
We'll create our form component inside the form folder and also out testing file. We first want to create a test to see if the app contains a title.
import "@testing-library/jest-dom/extend-expect";
import { render, screen } from "@testing-library/react";

import { Form } from "./form";

describe("Form component tests", () => {
  test("Should contain a title", () => {
    render(<Form />);

    const titleElement = screen.queryByText(/form/i);
    expect(titleElement).toBeInDocument();
  });
});
Both describe and test are reserved keywords. The describe keyword allows you to group all related tests together and the test keyword is where you'll write the code for testing.

After running this test well, it fails because there's nothing on the form.js file, let's fix that and make it run!
First we'll create our form component and add the needed title, after that let's try again
import React from "react";

export const Form = () => {
  return (
    <>
      <h1>Form</h1>
    </>
  );
};

Great! now let's keep on going, for now there's no need for refactoring. We'll add a test to make sure there's our name and age input in the form component.
import "@testing-library/jest-dom/extend-expect";
import { render, screen } from "@testing-library/react";

import { Form } from "./Form";

describe("Form component tests", () => {
  ...
  test("Should contain a name and age input", () => {
    render(<Form />);

    const nameInputEl = screen.queryByLabelText(/name/i);
    const ageInputEl = screen.queryByLabelText(/age/i);
    expect(nameInputEl).toBeInTheDocument();
    expect(ageInputEl).toBeInTheDocument();
  });
});
Now again, the test fails because there are no labels for name and age. For out test to run smoothly, our form should look like this:
import React from "react";

export const Form = () => {
  return (
    <>
      <h1>Form</h1>
      <form>
        <label htmlFor="name">Name</label>
        <input id="name" name="name" type="string" />
        <label htmlFor="age">Age</label>
        <input id="age" name="age" type="string" />
        <button type="submit">submit</button>
      </form>
    </>
  );
};
Before jumping to the last test, let's first refactor the two we already have.
describe("Form component tests", () => {
  beforeEach(() => {
    render(<Form />);
  });
  ...
});
By adding the beforeEach function we can execute any piece of code before every test, in our case we want to render the form component before every test.
Now we can proceed to our final step, let's make sure the form is being submitted. For that we'll have to add a new test case.
import "@testing-library/jest-dom/extend-expect";
import { fireEvent, render, screen } from "@testing-library/react";

import { Form } from "./Form";

describe("Form component tests", () => {
  beforeEach(() => {
    render(<Form />);
  });

  ...

  test('Should submit the form', () => {
    const nameInputEl = screen.queryByLabelText(/name/i)
    const ageInputEl = screen.queryByLabelText(/age/i)
    const submitBtn = screen.queryByRole('button', {name: /submit/i})

    fireEvent.change(nameInputEl, {target: {value: 'John Doe'}})
    fireEvent.change(ageInputEl, {target: {value: '20'}})
    fireEvent.click(submitBtn)

    const expectedMsg = screen.queryByText(/success/i)

    expect(expectedMsg).toBeInTheDocument()
  })
});
We run our tests once again to verify that nothing has been broken .
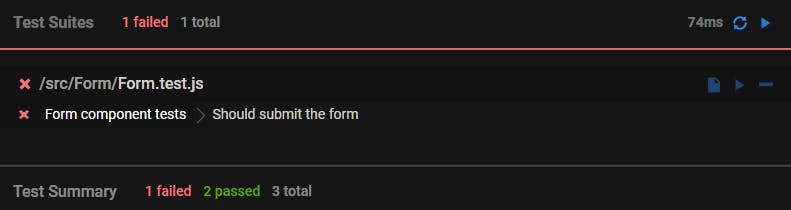
We see that our two previous test are working completely fine, just out new test is the one that's not working, but we already know that's fine. Let's finish this exercise by adding out submit functionality!
import React, { useState } from 'react'

export const Form = () => {
  const [isSubmitted, setIsSubmitted] = useState(false)

  const handleSubmit = event => {
    event.preventDefault()
    setIsSubmitted(true)
  }

  return (
    <>
      <h1>Form</h1>

      {isSubmitted && <h2>Success</h2>}

      <form onSubmit={handleSubmit}>
        <label htmlFor="name">Name</label>
        <input id="name" name="name" type="string" />

        <label htmlFor="age">Age</label>
        <input id="age" name="age" type="string" />
        <button type="submit">submit</button>
      </form>
    </>
  )
}
Now that we added the functionality for our success feature there's only one thing left to do, let's make sure everything works fine.
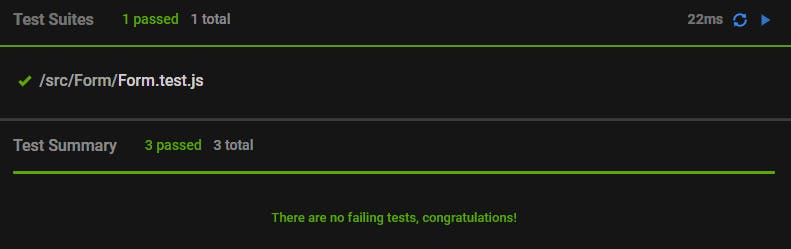
So satisfying...
Codesandbox link
codesandbox.io/s/tdd-react-example-7905r?fi..
Conclusion
Test driven development is such an amazing technique that I'm starting to put in practice. It gives me a great relief to know that most of my code is being tested and if there's a new feature that breaks an already existing functionality it would be easy to identify by just running my tests.
Until next time!